
Office 365 is a powerful application preferred by numbers of user and high level business. It is also known by many nicknames such as OWA/Exchange Online/O365. In this post, you will know that how to create shared mailbox in Office 365 and how to assign the files between the team member and collaborators.
Why we create a shared mailbox in Exchange Online?
The best effect of sharing mailboxes is that if you share the mailbox, then the team members can easily open read and reply of any email address. In other word, you can divide work according to the specialties team or category like support team, sales team, info, etc. or it is also a good way to share a confidential files. However it is mainly used in large enterprises according to the load of work.
Who can create a shared mailbox in Office 365?
This is not a big deal to create a sharing folder, but everything is in the hands of the administrator or admin. If you are an administrator or you can access the admin portal, you can easily allocate shared mailboxes.
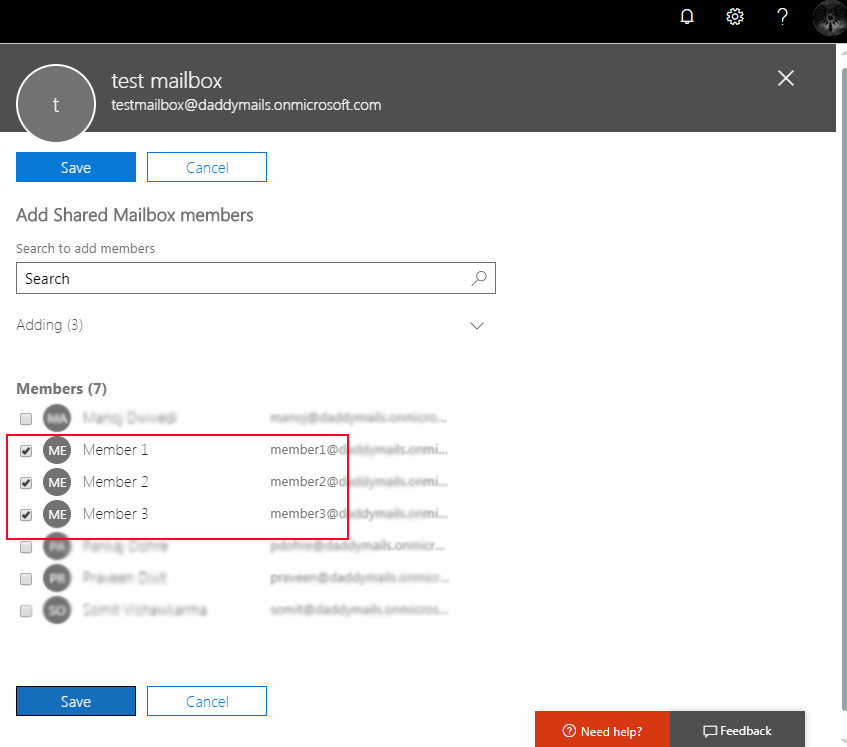
Create shared mailbox in O365 & assign the member
Let’s see how to put or verify the team in the shared mailbox.
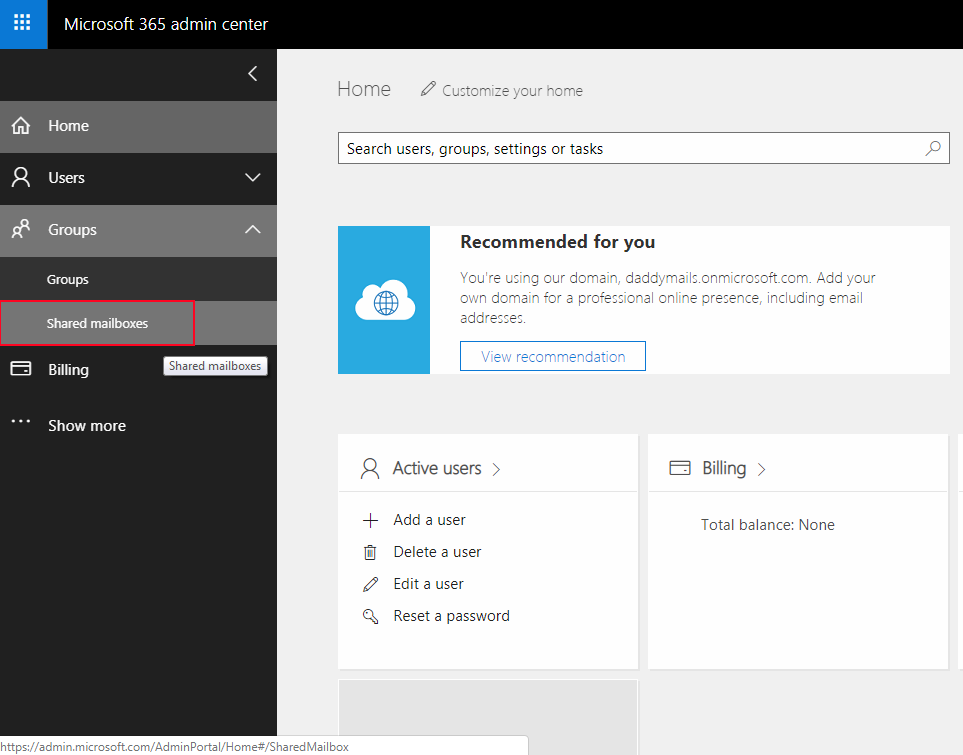
- Sign in to O365 account >> Go to admin account or Exchange Online account (if you get this message “You don’t have permission to access this page or perform this action” then you can’t access admin portal.)
2. In the left navigation menu >> expand the Group menu and choose shared mailbox.
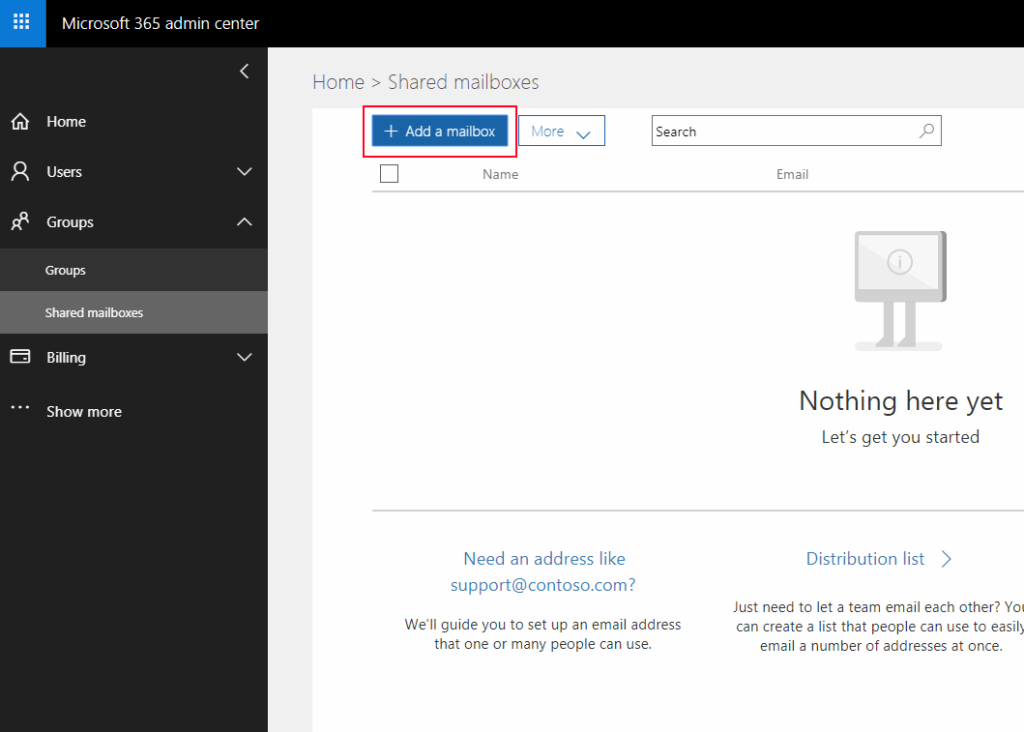
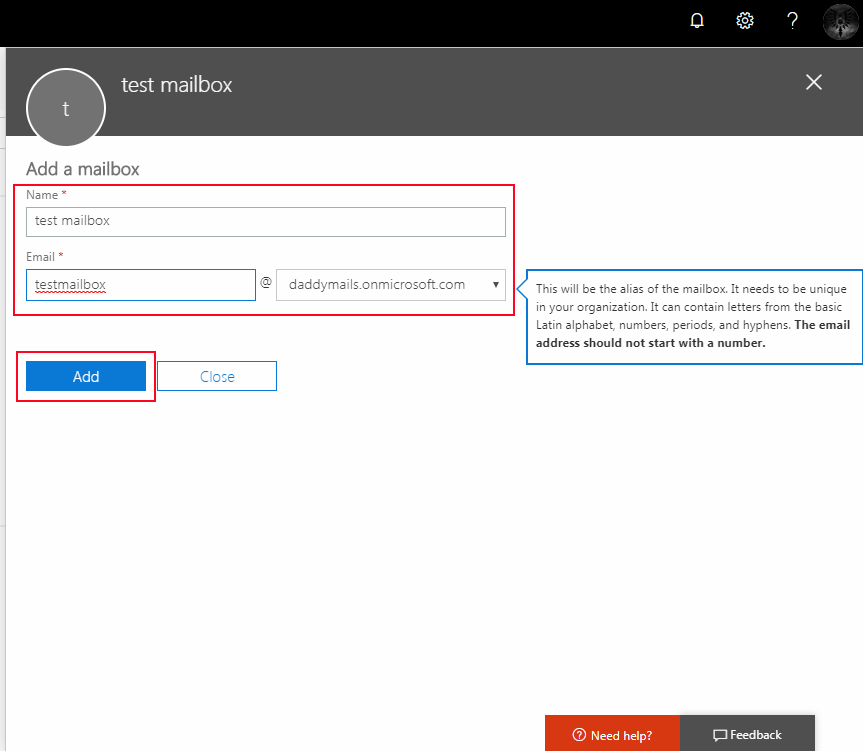
3. Click on Add Mailbox button >> Enter the name, in which you want to use this mailbox like support or Team of support >> after that give the support mail id.
4. Under the next step choose “Add team member in this mailbox” and click “+Add member” button
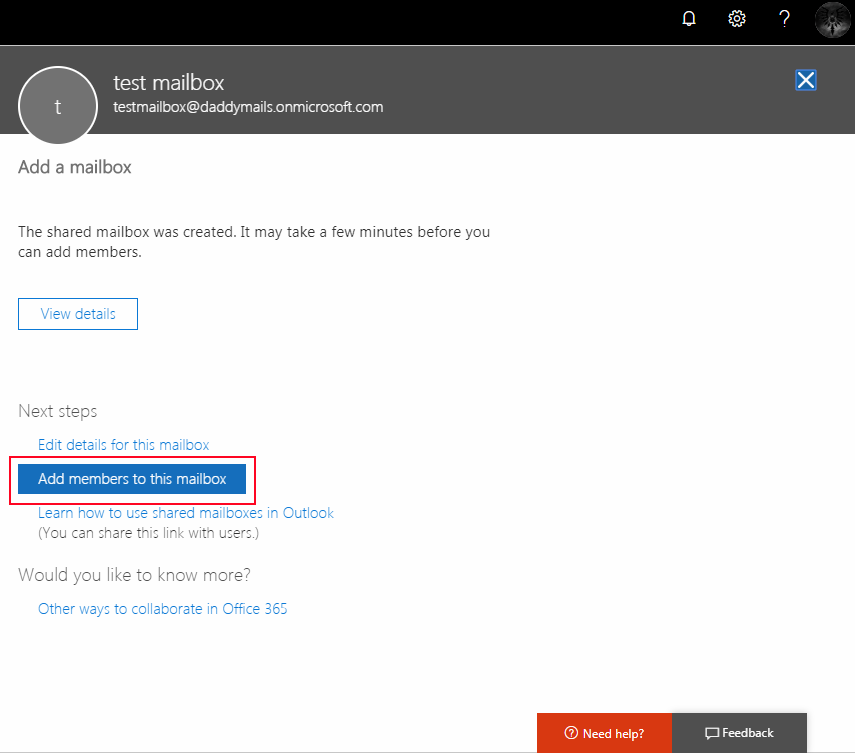
5. You can search the name or select the name from given list. >> when, you done then choose “save” >> hit close button.
By default it is set. When a user sent a message then it saved into the “Send Item” folder. Therefore, If you want to allow everyone to see the sent mail then “Edit” the shared mailbox setting.
6. Finally, if you want to make changes to the shared mailbox again, click on it and press the “Edit” button (parallel to the field).
How to add shared mailbox to Outlook
When a user purchase Office 365 license then auto-mapping is enable by default (mostly users do). The shared mailbox will appear in your Outlook when you restart the Outlook.
Getting an error message to send Email
It is occurred when latency issue happened in Office 365 and shows a message.
“This message could not be sent. You do not have the permission to send the message on behalf of the specified user.”
Due to the fact that due to the complexity of several connections, this error is automatically remove when the shared data box is connected to the Microsoft Data Center.
Know more about shared mailbox visit Microsoft website here: http://aka.ms/CreateSharedMailbox
Can I Upload my MBOX files to Shared Mailbox?
Yes, you can migrate all MBOX files into Office 365 or Exchange Online cloud. But, you need a MBOX to Office 365 Migration tool to open MBOX data in O365 environment directly.
Final verdict:
I hope you have learned about sharing mailboxes as well as “How to create shared mailbox in Office 365 or OWA”. This is a very useful way to deliver mails between the operators or team member.